Projects
ConTech
A Command Line Interface (CLI) application for managing computing-related contacts. Optimised for use on the CLI, ConTech allows you to seamlessly add, edit, view, list, search, and import your contacts. ConTech aims to improve your efficiency at work, be it by cutting down the time required to look up for various usernames when working with colleagues, or by importing hundreds of contacts with just one simple command.
____________________________________________________________

   _____         _______        _
  / ____|       |__   __|      | |
 | |     ___  _ __ | | ___  ___| |__
 | |    / _ \| '_ \| |/ _ \/ __| '_ \
 | |___| (_) | | | | |  __/ (__| | | |
  \_____\___/|_| |_|_|\___|\___|_| |_|

____________________________________________________________

Hello, Ashraf.
Welcome back to ConTech, your personal contact tracker.
____________________________________________________________
This was a group project and work was split amongst 5 members. My task was to create the view and help features, while also implementing a duplicate checker for our add and edit features to ensure that the contact book does not keep duplicate contacts. Throughout the duration of the project, we followed the Agile Methodology where we had 3 different sprint periods from coming up with user stories to determine features to conducting proper testing of the application. This application was done in Java.
Jarvis
A Command Line Interface (CLI) application for scheduling and managing tasks. Jarvis allows you to add a task to be done, task with a deadline, schedule an event, list tasks, mark a test as done, delete a task, and find a specific task.
This was an individual project and the application was mostly done in Java.
       __  ___      ____ _    __  ____ _____
      / / /   |    / __ \ |  / / /  _// ___/
 __  / / / /| |   / /_/ / | / /  / /  \__ \
/ /_/ / / ___ |_ / _, _/| |/ / _/ /_ ___/ /
\____(_)_/  |_(_)_/ |_(_)___(_)___(_)____/
____________________________________________________________
Good day Sir! J.A.R.V.I.S. here!
____________________________________________________________
A new file has been created to store your tasks Sir!
What would you like me to do Sir?
____________________________________________________________
todo read a book
____________________________________________________________
Noted Sir. I've added this task:
 [T][ ] read a book
You currently have 1 tasks in your list Sir.
____________________________________________________________
Alex
Alex is a remotely operated Search-and-Rescue robot that can assist disaster rescue teams in gathering data of the environment and locate victims within the disater-stricken area. A remote operator can control Alex by transmitting commands to and receiving information from the Raspberry Pi on Alex. The Pi communicates with an Arduino also on Alex through the Universal Synchronous/Asynchronous Receiver Transmitter (USART).
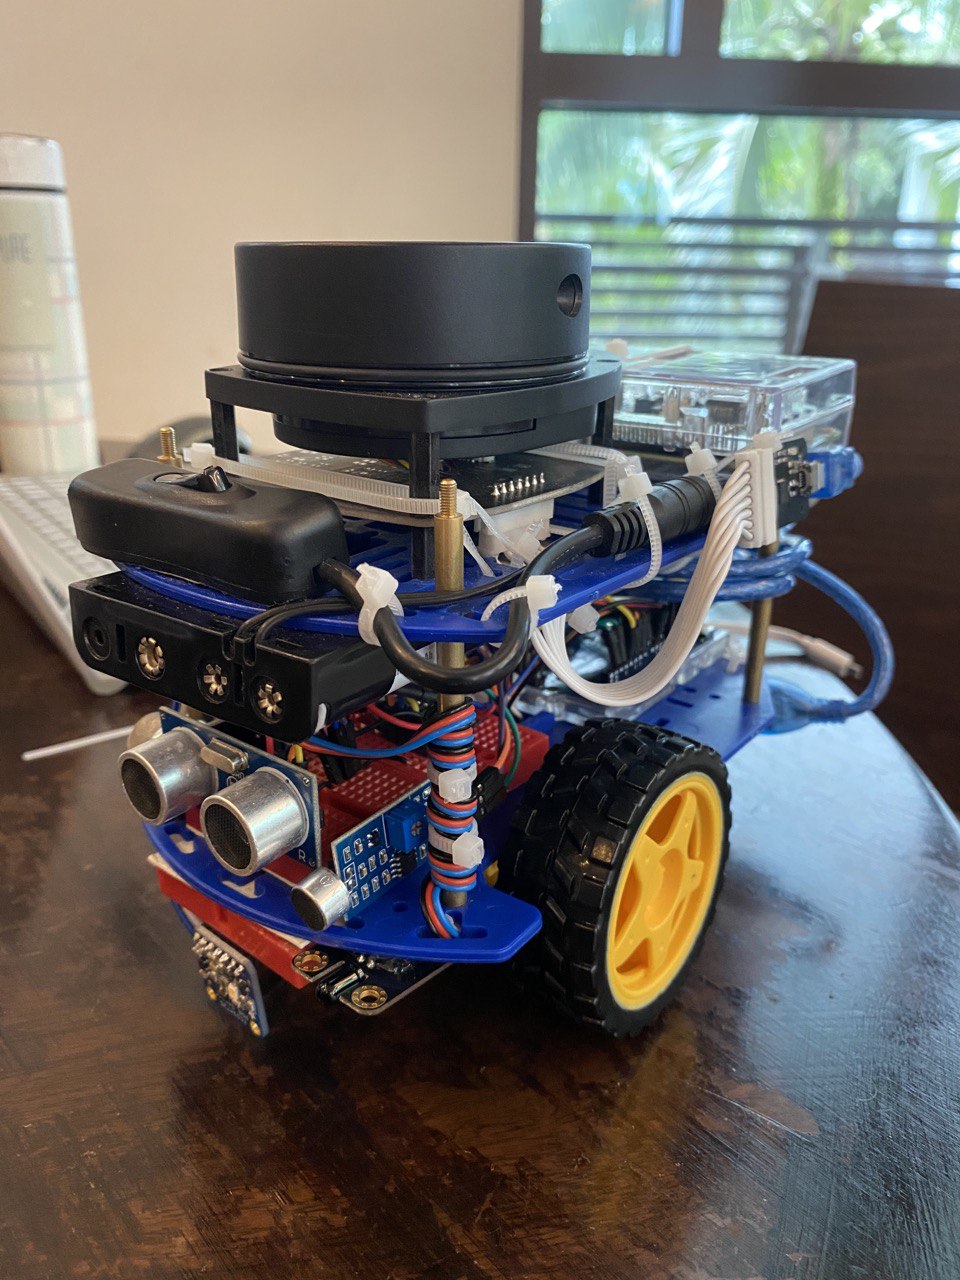
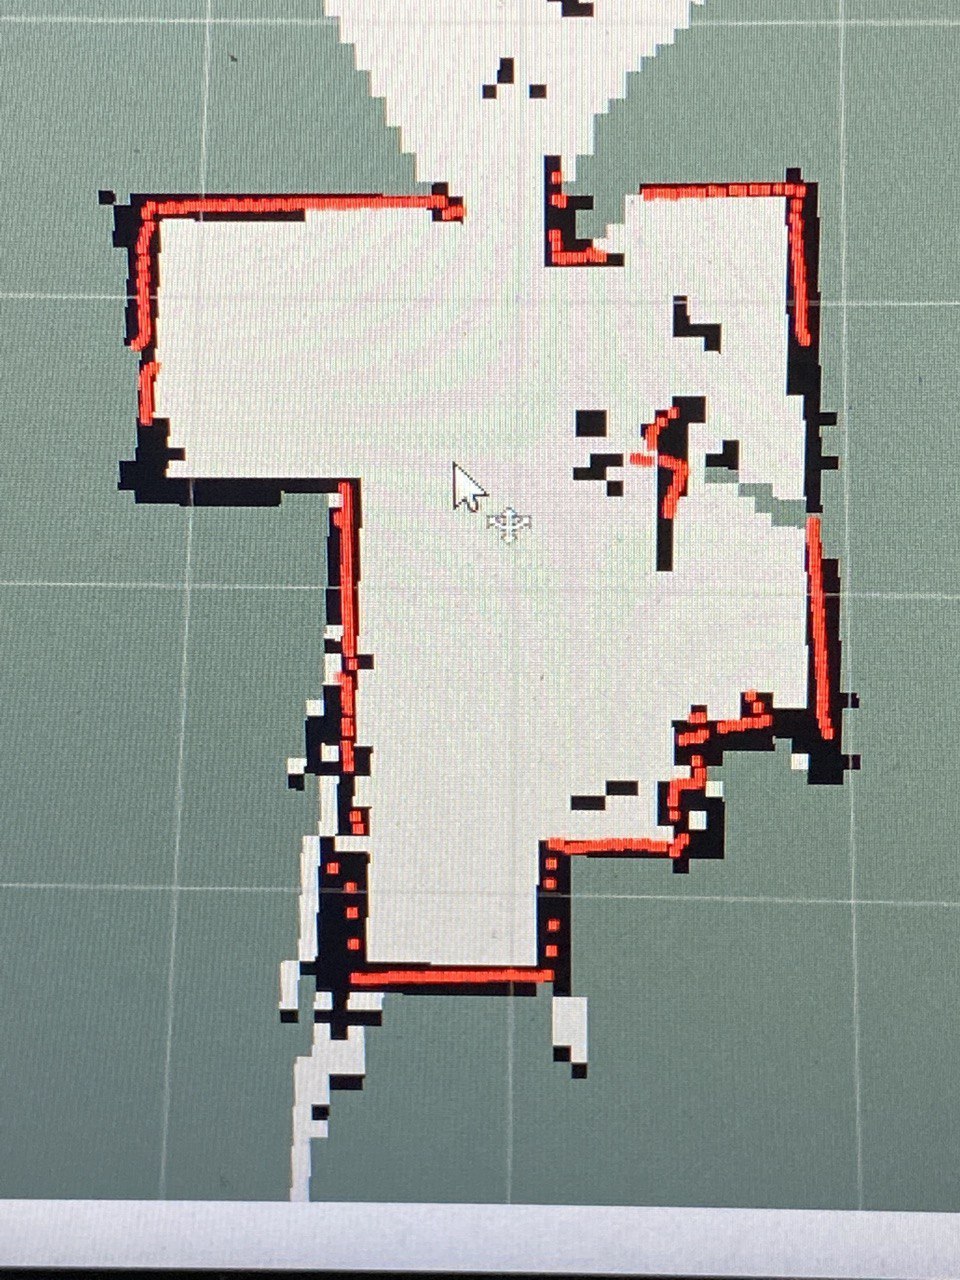
Alex is also equipped with a LiDAR sensor in order to form a map of its surroundings. The transfer of information between Alex and the operator works via Robotic Operating System (ROS) which uses a message broadcast and subscription model for communication between machines. We then use Hector SLAM as a visualisation package to draw out a map from the scans made by the LiDAR. Additionally, Alex also has colour, ultrasonic, gas, flame, and sound sensors as my team felt that these were essential on a Search-and-Rescue robot.
My task for this project was setting up ROS on the RPi and connecting it to the operator’s computer, implmenting Hector SLAM to map out the surroundings and to implement Alex’s movement functionalities while also driving Alex in the final testing maze.
mBot
The mBot was a project done during one of my modules. The objective of the mBot was to solve a random maze on its own given the functions that we have programmed on the bot. The mBot has ultrasonic sensors at the front to detect objects, infrared sensors on both sides to detect the maze walls to steer itself straight depending on its distance to the walls, and a colour sensor at the top to detect the colour of the maze roof which will dictate which direction the bot will move. This colour challenge function is triggered whenever the mBot detects a black strip on the floor.
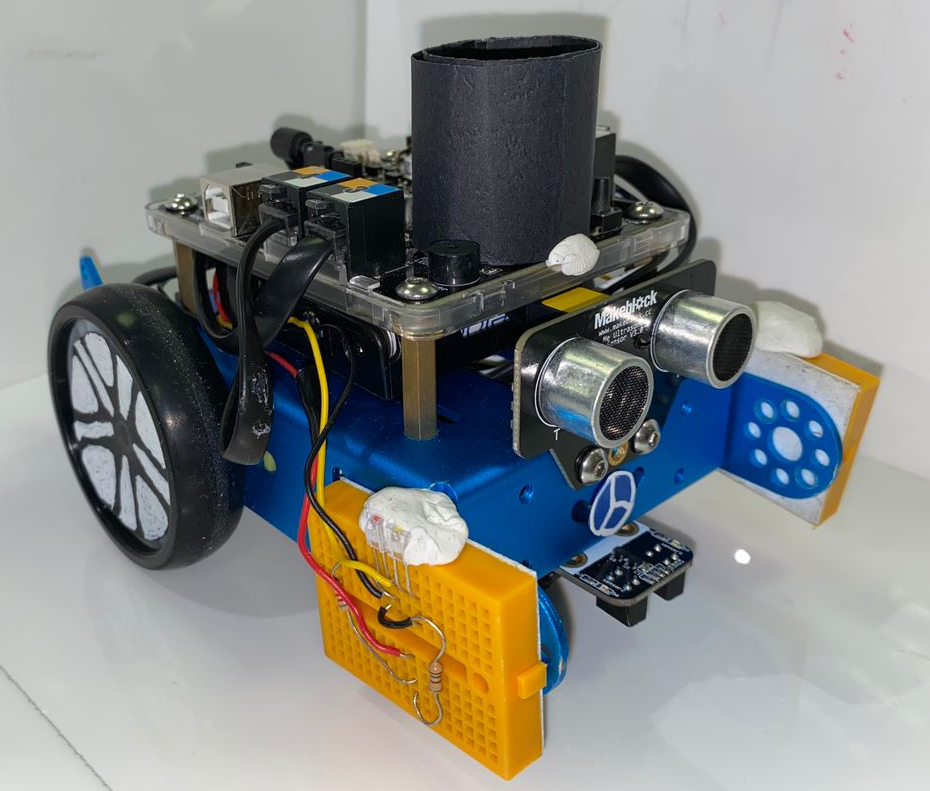
The mBot will continue finding its way until it detects a roof with black paper, indicating the end of the maze. It will then activate its buzzer and play a celebratory tune as it has completed the maze. The functions are implemented using conditional statements in an infinite loop often used for Arduinos.
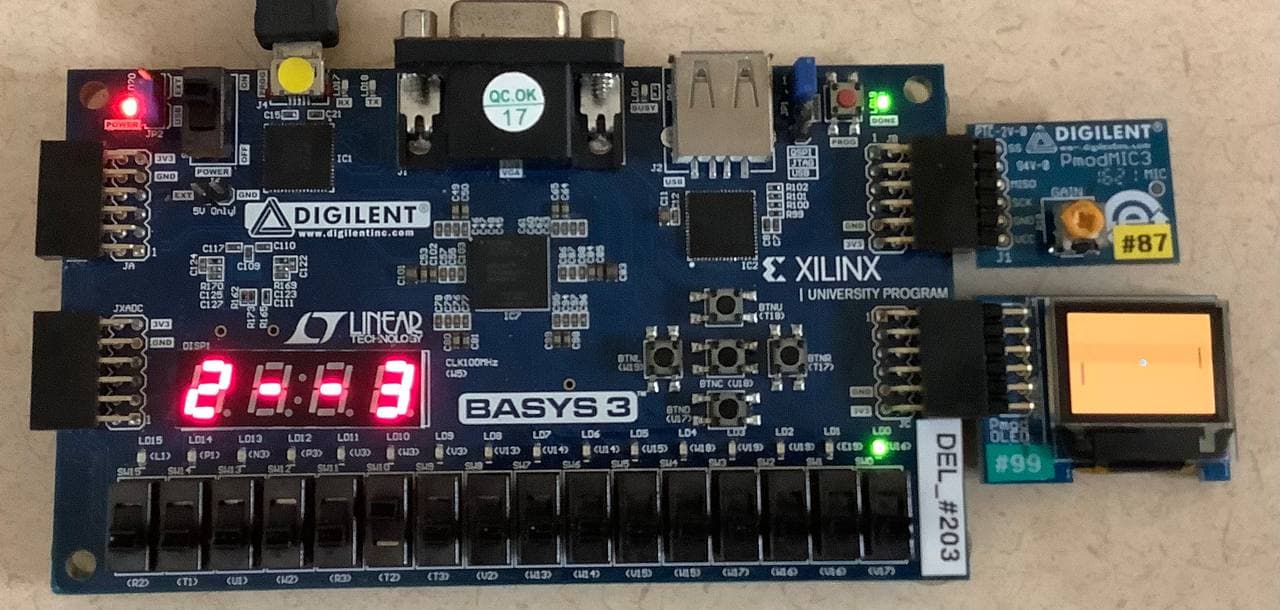
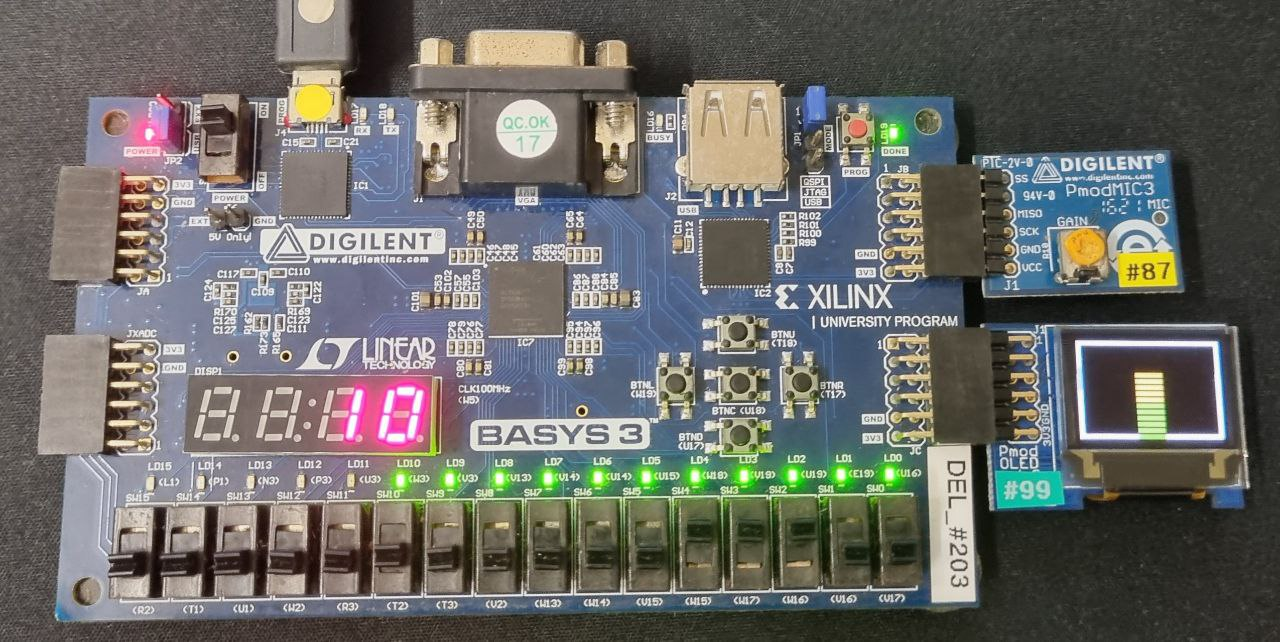
FPGA Sound Display and Games
In this project, my project partner and I had to programme an FPGA board using Verilog. The main task was to create an sound display visualiser. We were given a microphone and LED display to be connected to the FPGA board. Whenever the microphone detects a sound, it will display the volume of the sound via the small LEDs over the switches. The connected LED Display can also be switched on to display a better visualisation of the volume level. The seven segment display on the left of the board will also display the volume level.
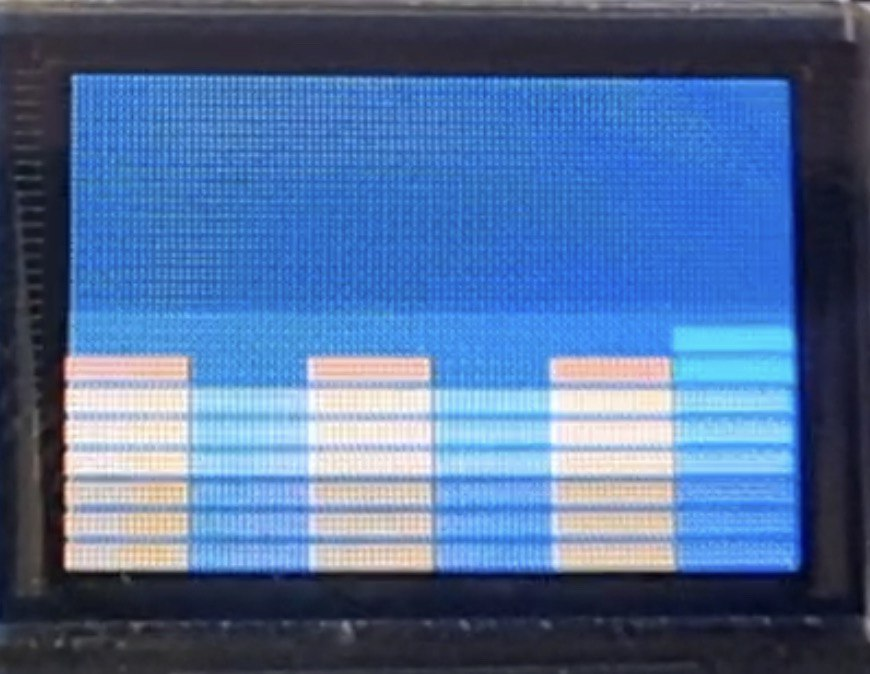
Here is our working sound display with the volume bar.
Apart from the main task, we were given the freedom to create our own improvements and games to further show our understanding of Verilog, using the FPGA board and designing digital systems. For my individual work, I made a volume wave indicator that is able to display the changing volume levels to form a sound wave using volume bars.
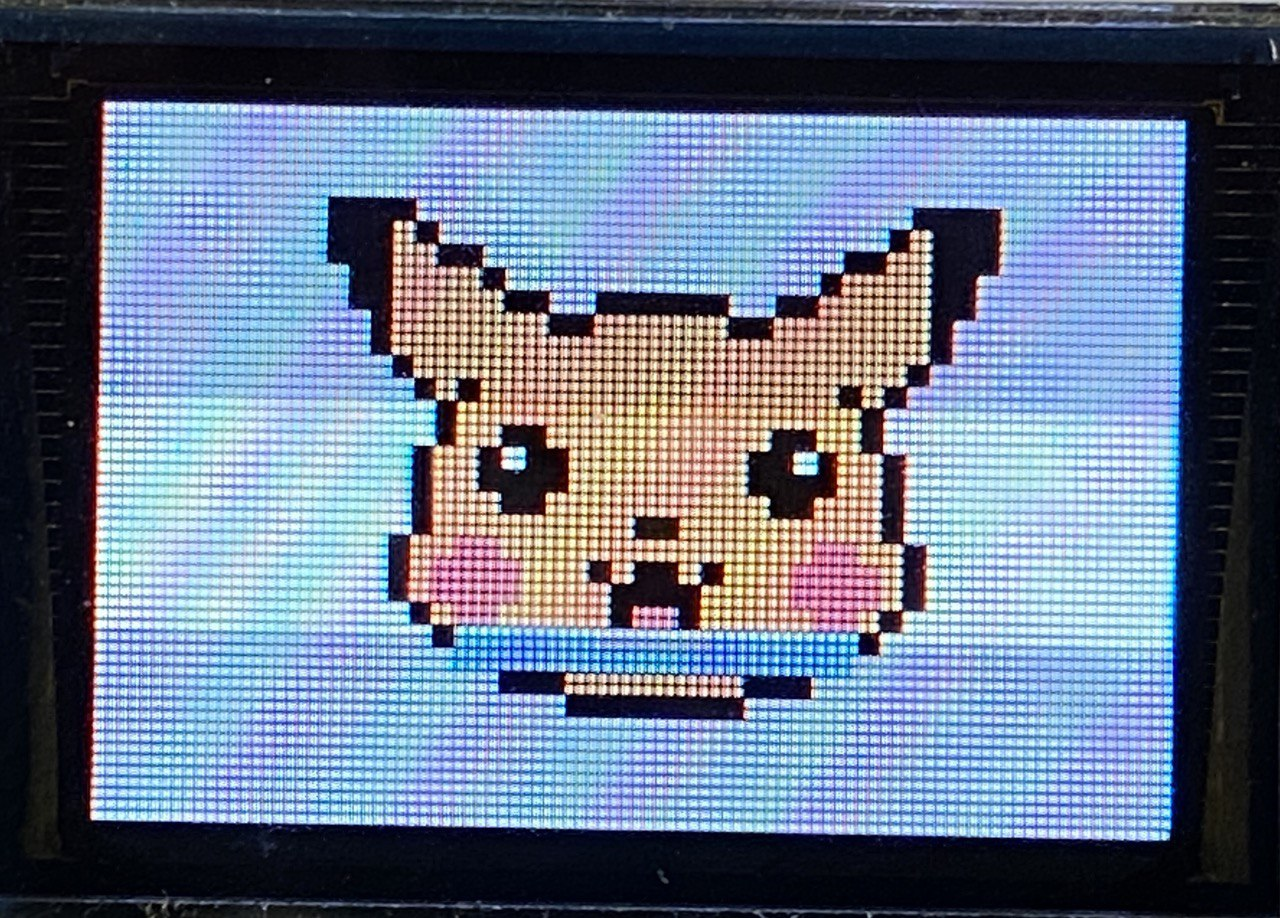
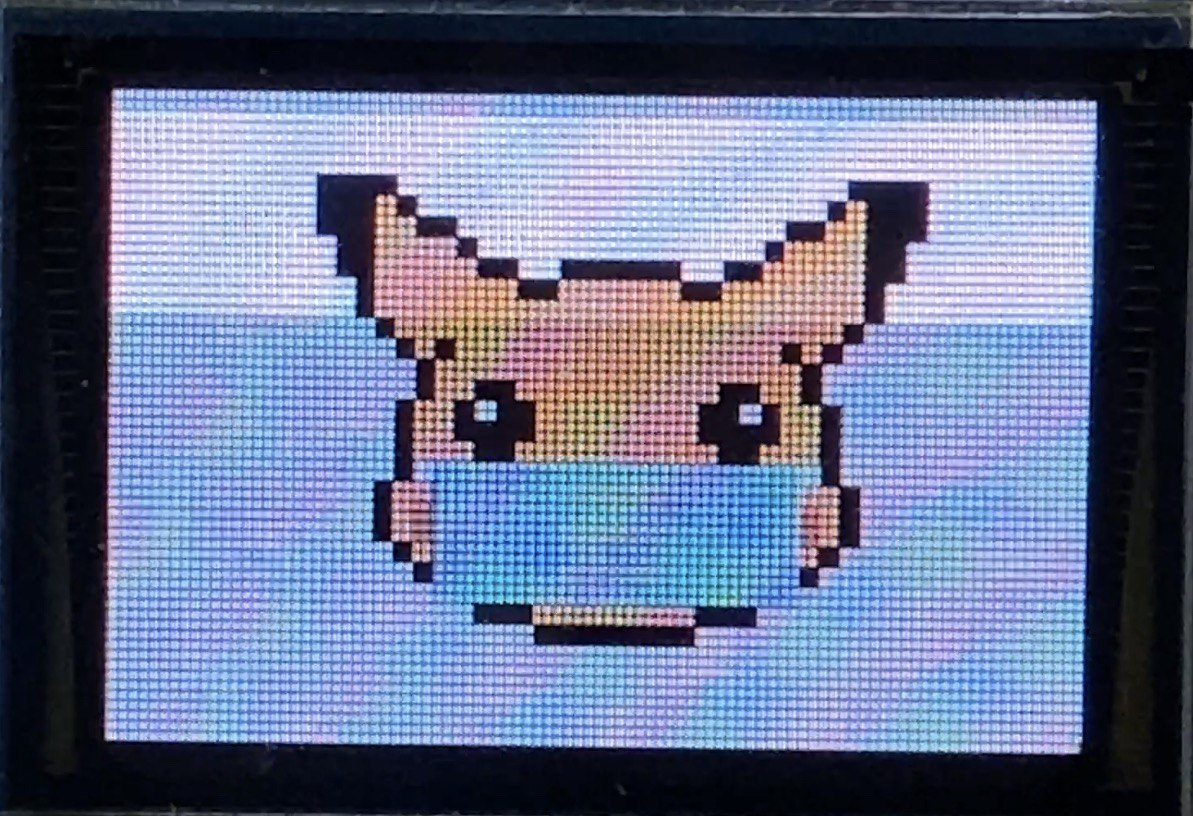
Secondly, I made a volume detector with a Pikachu mask visualisation. As the volume gets louder, or when a user blows into the mask, Pikachu gradually wears a full mask (so that it does not catch a virus when someone blows into his face >.<).
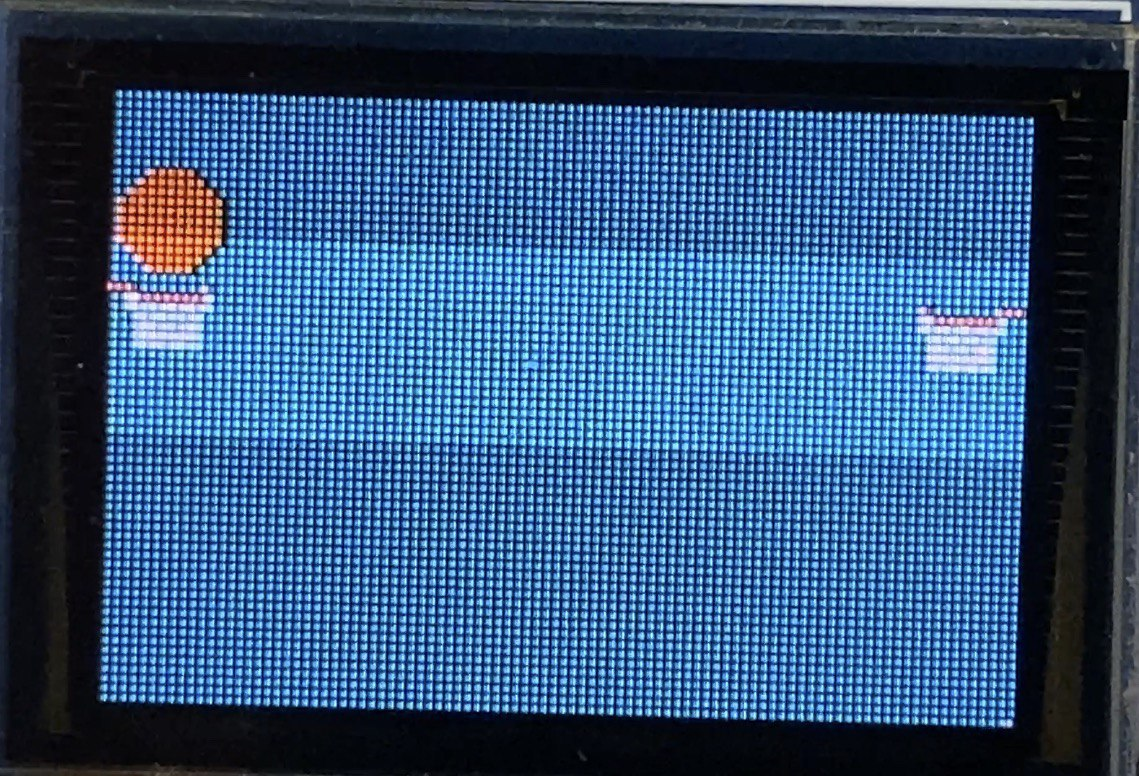
Last but not least, I made basketball game for 2 players. To score a point, a user must blow into the mic to lift the ball up and use the buttons on the FPGA to control the ball’s movement. The user then stops blowing into the mic when the ball is above the hoop so that it can fall into the hoop to score a point.
For our final team item, we made a single and multiplayer ping pong game. A switch is used to determine whether player would like to play against the AI or against another player. Player will then use the buttons on the FPGA board to control the paddle. The scores for each player and AI will be displayed on the seven segment display and players can play up to 10 points. There are 3 levels of ball speed in both player modes and players can select the mode by making a loud sound to the mic, such as by snapping their fingers. The levels are indicated by the background colour, green, yellow, red, in order of slowest ball speed to fastest.